How to Fix GOBI Card Settings After Installing Ubuntu
Posted by Jackie Anderson, DJ Smith, TJ Supper on 3rd Jun 2021
In a previous blog, we gave you the steps to install Ubuntu on a Panasonic Toughbook CF-31. Maybe you successfully installed Ubuntu, but ran into issues with the Gobi card settings. No need to worry-we can help with that. In the following blog, we'll explain step-by-step how to fix them.
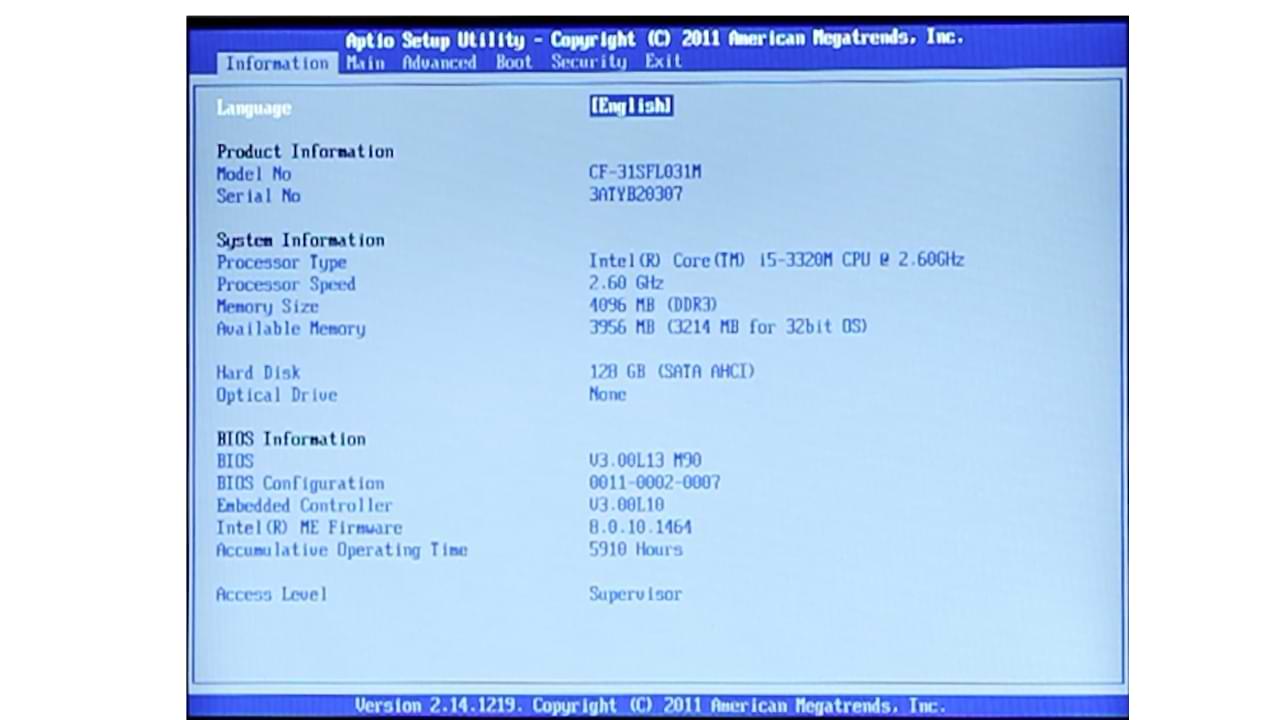
Step One: Boot the Toughbook into BIOS

When the Toughbook first starts to boot up, a Panasonic logo will appear across the screen. When you see this, press the F2 key.
Step Two: Enable Wireless WAN
- Once inside the BIOS, using the arrow keys, navigate to the Main page.
- Scroll down to Optional Kit Configuration.
- With Optional Kit Configuration highlighted, press the Enter key.
- You will then be prompted to enter a password. Type
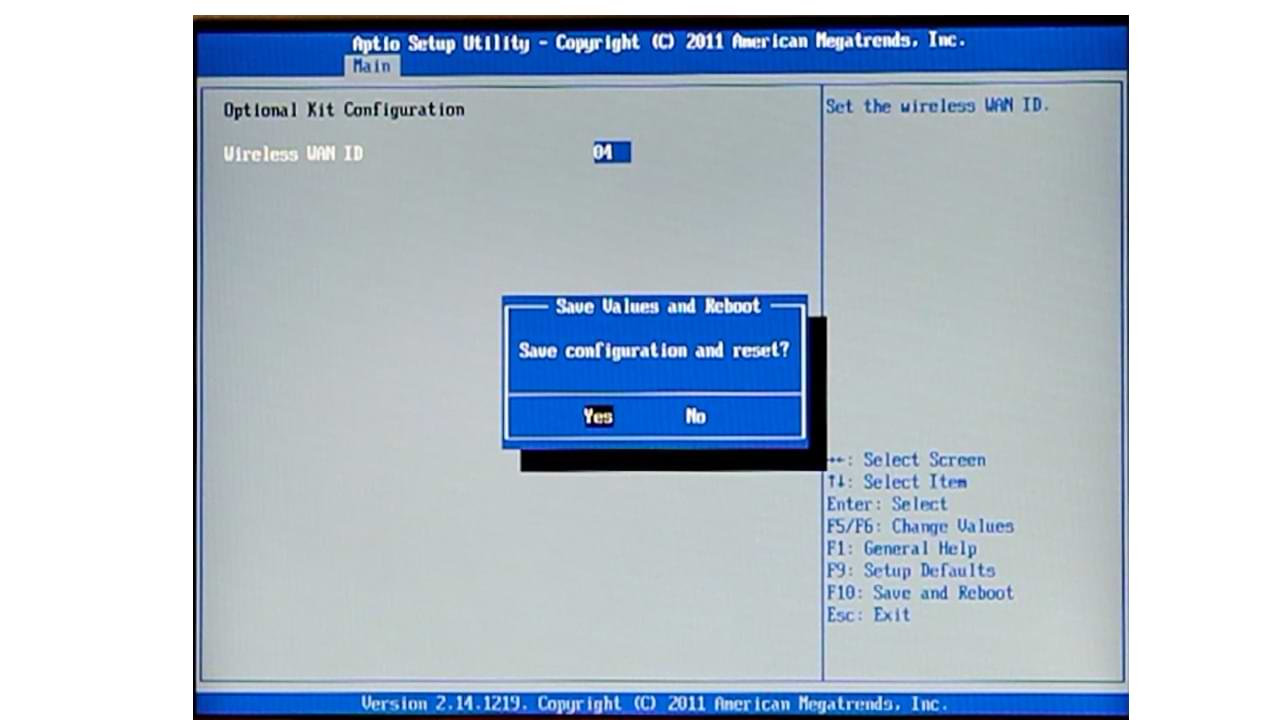
toughkitinto the field and press the Enter key. - A new window will open where you will be asked to set a Wireless WAN ID. Depending on what model CF-31 you have (find your model here), the value should changed to either 04 or 13 (if it is not already set to that value).

- Once you type in the value, press the Enter key.
- Next, press the F10 key to open up the prompt to save changes.
- Use the arrow keys to select Yes and then press Enter. Your CF-31 will restart.
- Once your CF-31 restarts, and the Panasonic logo comes back up, return to BIOS by pressing the F2 key again.
- This time, use the arrow keys to navigate to the Advanced page of BIOS.
- Scroll down to Wireless Configuration and hit the Enter key.
- You will be taken to another page which should provide a list of networking devices and their statuses. If you ever visited this page previously, you will notice a Wireless WAN option if it was not there before. Hover over the Wireless WAN option so that it is highlighted and if it is Disabled, press Spacebar once which should change it to Enabled. If you do not see a Wireless WAN option on this page, return to step 5 and try setting your Optional Kit Configuration Wireless WAN ID's value to the alternative value.
- With the Wireless WAN set to Enabled, save the BIOS with the F10 key and press Enter over Yes to save.
Step Three: Open Network Settings

- Turn on your CF-31, this time, letting it boot up into your Ubuntu operating system. Once fully loaded, sign in.
- In the top, right-hand corner, click the down arrow icon.
- Select Mobile Broadband Off.
- In the options that drop down, click Mobile Broadband Settings.
- Under the mobile broadband slider will be a bar that says Network: Add a new connection, Click to add a new connection to receive a pop up showing the information you will need to set up a mobile broadband connection.
- You can select Next provided you have the following; a cellular/broadband provider, an activated SIM card for your plan (inserted into the CF-31), and the APN for the plan that you have.
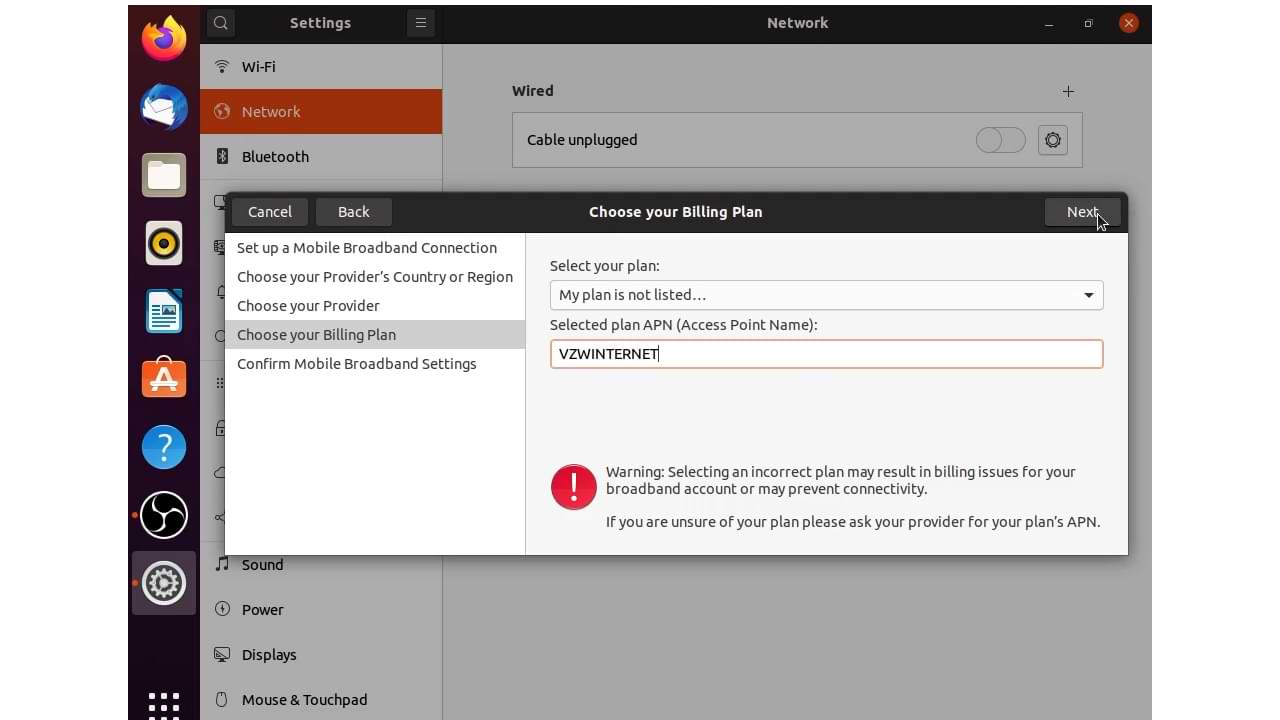
- If you do choose to select my plan is not listed, you will have to enter your APN manually under Selected Plan APN. As an example the default Verizon APN is
VZWINTERNET. - You should now be able to toggle on and off the ability to connect using mobile data as your internet connection.
(e.g., when using a Verizon SIM card, you would select Verizon as the provider and select Next. It will then ask you for the billing plan.)
On a personal note, TJ says, "I've never used one of the preset selections. I've always used my plan is not listed and entered in my APN manually. That way, I know my settings are exactly how I need them. However if you can get once of the preset selections to work, there shouldn't be anything wrong with doing it that way either."
...and you're done!

