Toughpad FZ-G1: How to Access and Update the BIOS
21st Jun 2023
The Toughpad FZ-G1 is a Windows tablet that Panasonic made for field workers like Police, Firefighters, and EMS. Perfect for anyone who is always on the move. This rugged tablet has a 10.1" screen and runs on Windows 10 Pro 64-Bit. It is one of the thinnest and lightest fully rugged tablets in its class. Powered by Intel, the FZ-G1 meets MIL-STD-810G standards and has an Ingress Protection Rating of IP65, making it a top choice for mobile computing. It features a high-definition, daylight-readable, 10-point multi-touch screen that works with your finger, stylus, glove, and while wet, making it an essential piece of equipment for those working out in the field.
What Does the BIOS Do?
BIOS, or Basic Input/Output System, is a type of firmware that comes preinstalled and stored on a small memory chip on a computer's motherboard. The BIOS has four vital functions:
- POST (Power On Self-Test): The POST is a preliminary function that involves testing the computer’s hardware before you boot into the operating system.
- Drivers: The BIOS contains low-level drivers that allow the user to control and manage the computer's hardware.
- BIOS Setup: The BIOS setup function is a configuration utility that enables you to change the hardware settings for your system. System configurations like the time, date, and passwords are included here.
- Bootstrap Loader: The bootstrap checks for available operating systems installed on the computer. If an operating system is found, an effort will be made to load it using the BIOS Setup settings and the various drivers that give access to the computer's hardware.
The BIOS is stored on non-volatile memory. The non-volatile memory will keep track of and store the configuration and settings made to the device even if the power is cut off. This is crucial when saving information about settings like the BIOS’s administrator password or the boot order.
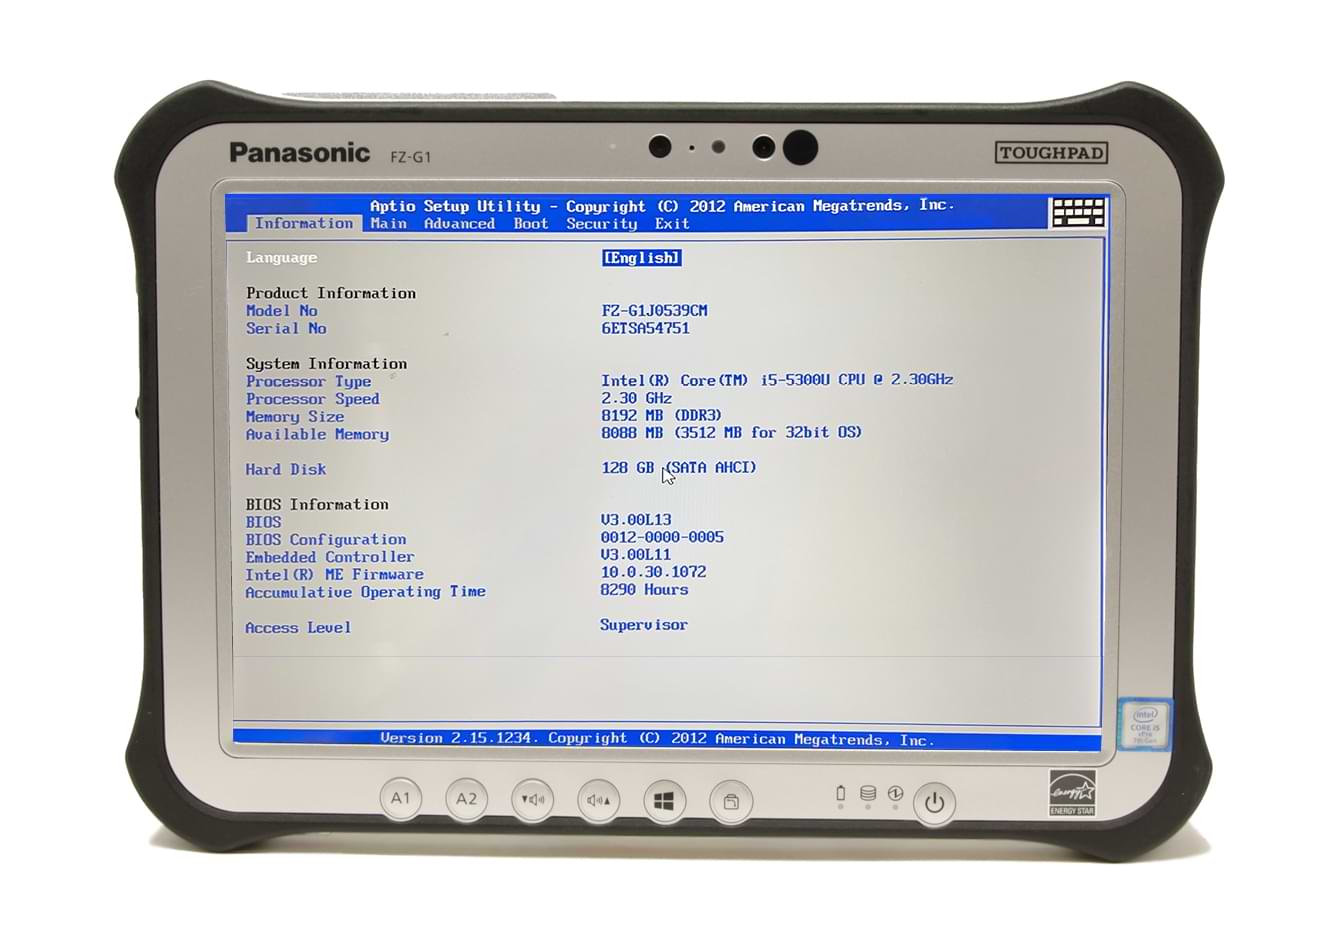
How to Access the Toughpad FZ-G1's BIOS
There are several different ways to enter the BIOS on the FZ-G1. If you have a peripheral keyboard attachment to the FZ-G1, press the F2 key when the Panasonic Logo appears on the screen during the startup process. If you don’t have a keyboard, you can tap the top left-hand corner of the touchscreen while that same Panasonic logo appears during startup. This should also allow you to boot into the BIOS.
If you have Windows 10 or 11 installed on your FZ-G1, there’s a chance that you may not be able to use either of the two methods mentioned previously. In this case, go to the Start Menu and select the Settings cog wheel. In the new window that opens up, select Update & Security. Next, select Recovery in the left-hand pane. There should now be a button that you will need to click with the text Restart Now under Advanced Startup. You will then be taken to a screen with a blue background. On this new screen, select Troubleshoot > Advanced Options > Startup Settings > Restart. Now press the F2 key or tap in the top left-hand corner of the screen to enter BIOS.
Preliminary BIOS Update Checklist
Before updating your BIOS, follow these steps to ensure the BIOS update completes its installation without any issues. Failure to follow these preventive measures may result in a corrupt BIOS and “bricking” your tablet.
- Log into Windows as an administrator.
- Connect your tablet to its AC adapter. Make sure your tablet is receiving power from the AC adapter.
- Make sure your battery is attached to the tablet. It is required to have at least 20% charge on the battery; however, it is recommended to have a fully charged battery to reduce the chance of the tablet losing power during the update.
- Disconnect all USB devices from the tablet.
- (Optional) Back up your data to an external media. While your data is not necessarily at risk of being damaged due to an update, it’s always a good idea to back up your data regardless.
FZ-G1 Toughpad BIOS Update Procedure
Once you have taken these precautions, go to Panasonic’s Support website here and download and extract the BIOS update. You must know your FZ-G1’s full model number to select the appropriate BIOS update (see below). (The FZ-G1 BIOS Update comes with a .pdf file with a set of instructions provided by Panasonic to guide users through updating the BIOS on the Toughpad FZ-G1. You can choose to follow the .pdf file or continue through this article.) Next, go to the folder to which you extracted your BIOS update and run the application (.exe) file. Once you open the application, go through the prompts. Once you reach a window that asks to “Start update now”, click OK, and the BIOS update will begin. Please do NOT turn off your FZ-G1 during this project, or the tablet may not start up when you turn it back on.
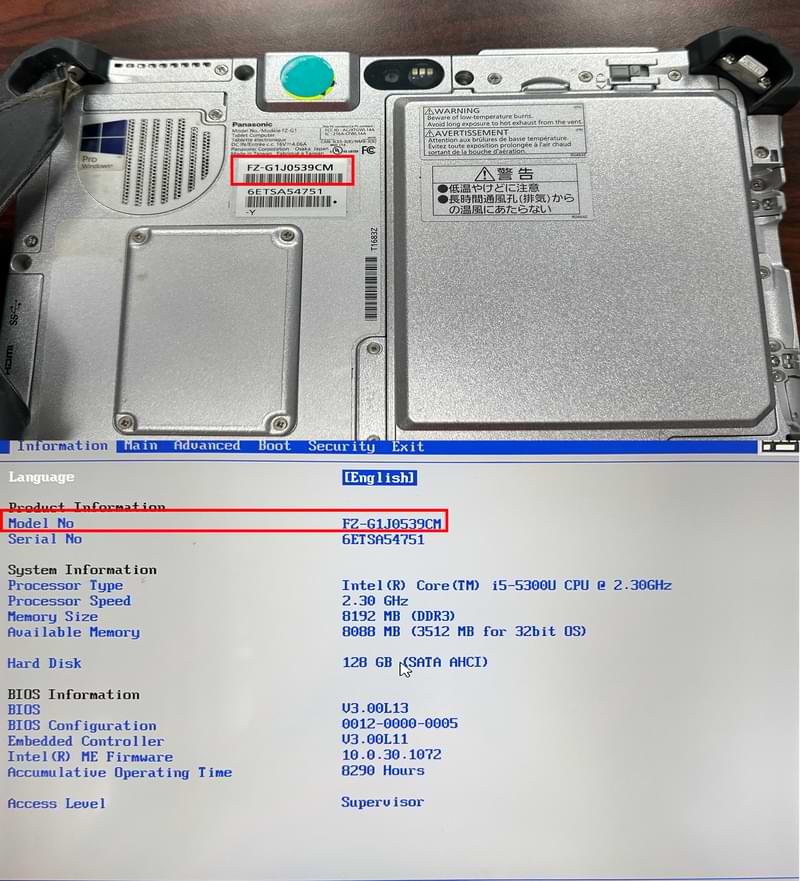
How to Find Your Full FZ-G1 Model Number
First, you must confirm your tablet's model number. Knowing this number is essential because the BIOS update procedures are specific to different models and may not work on all FZ-G1 models. You can find the model number on a white sticker under the battery or on the first page of the BIOS. Click the link if you want to learn more about Toughbook Model Numbers. Once you have confirmed that your Toughpad is one of the supported models, you can proceed with the update. Each generation of the FZ-G1 has its own BIOS update.
Need Help Updating the BIOS in Your Toughpad FZ-G1?
Updating the BIOS can be complicated and should only be done by experienced users or technicians. If you need help upgrading the BIOS, it is recommended to contact us. You can send your FZ-G1 in to have the BIOS updated and other various repairs by filling out our repair form.