How to Install Ubuntu on a Panasonic Toughbook CF-31
26th Oct 2020
Linux operating systems come in many flavors known as distributions, or “distros” for short. A distro contains the user interface and any necessary applications. One of the most popular and user-friendly Linux distros is called Ubuntu. Whether you’re just dipping your toe in the water or you’re already an enthusiast, you can’t go wrong with Ubuntu. It’s stable and well supported, robust, but still lighter weight than Windows.
We’ll be installing Ubuntu version 20.04, the latest stable release at the time of this writing, but if you want to try one of the related distros like Kubuntu or Lubuntu, the steps are roughly the same.
We’ve tested Ubuntu on the Toughbook CF-31 MK1, MK2, MK3, MK4 and MK5. It works on all of them, but some MKs require more tinkering to get up and running. We’ll include instructions for all of that.
Preparing your installation media
These instructions assume you are starting out with a machine running Windows 7/8/10 (not necessarily the same one you plan to install Ubuntu on). If you are using an older version of Windows or a Mac, this documentation from Ubuntu might help:
How to burn an installation DVD on Windows
How to create a bootable USB stick on Windows
How to burn an installation DVD on MacOS
How to create a bootable USB stick on MacOS
We’re not going to spend a ton of time on this part since the instructions are the same regardless of what kind of computer you are using. We have also covered this in a few other articles. But here’s the quick rundown. If you want to install Ubuntu from a DVD like we did (check the links above if you plan to use a bootable USB stick):
- Download the Ubuntu ISO file
- Pop a blank DVD in your drive, then
- Right click the ISO file and click “Burn disc image” then click the Burn button on the window that pops up.
Booting to your installation media

In order to continue with the installation, we need to tell your Toughbook to boot from the DVD (or USB) rather than the hard drive. With the DVD already in the drive (or the USB stick plugged in), make sure your Toughbook is plugged into a power source, then:
- Turn on your Toughbook and hit the F2 key as soon as the Panasonic logo pops up. This will bring you to the BIOS.
- Navigate with your arrow keys to the Exit tab.
- Using your arrow keys again, scroll down to where it says “Boot Override.”
- Under Boot Override, find the appropriate boot device that has the Ubuntu ISO installed and select it using the Enter key.
Installing Ubuntu
When your computer boots up, it will automatically open up a welcome window that will walk you through the installation process. It’s pretty straightforward and does a better job of guiding you than we can do here, so just follow along with the installation process and you’re all done! End of tutorial!
Getting everything working
Oops, I guess you’re not actually all done. It’ll take a little tweaking to get everything working properly on your Toughbook CF-31. There are a few things that might need a bit of attention, depending on which generation/mark (MK) your CF-31 is, including,
- Enabling the mouse touchpad
- Fixing the sound
- Calibrating the touch screen and
- Fixing the screen brightness keys.
With most of these fixes, you will have to use the terminal. The terminal is a text-only interface that allows you to give instructions to your machine and make adjustments to your system configuration. It can feel a bit intimidating at first, but you’ll be A-OK. We’ll tell you exactly what to type (or copy/paste) into it; you don’t even need to know what any of it means. 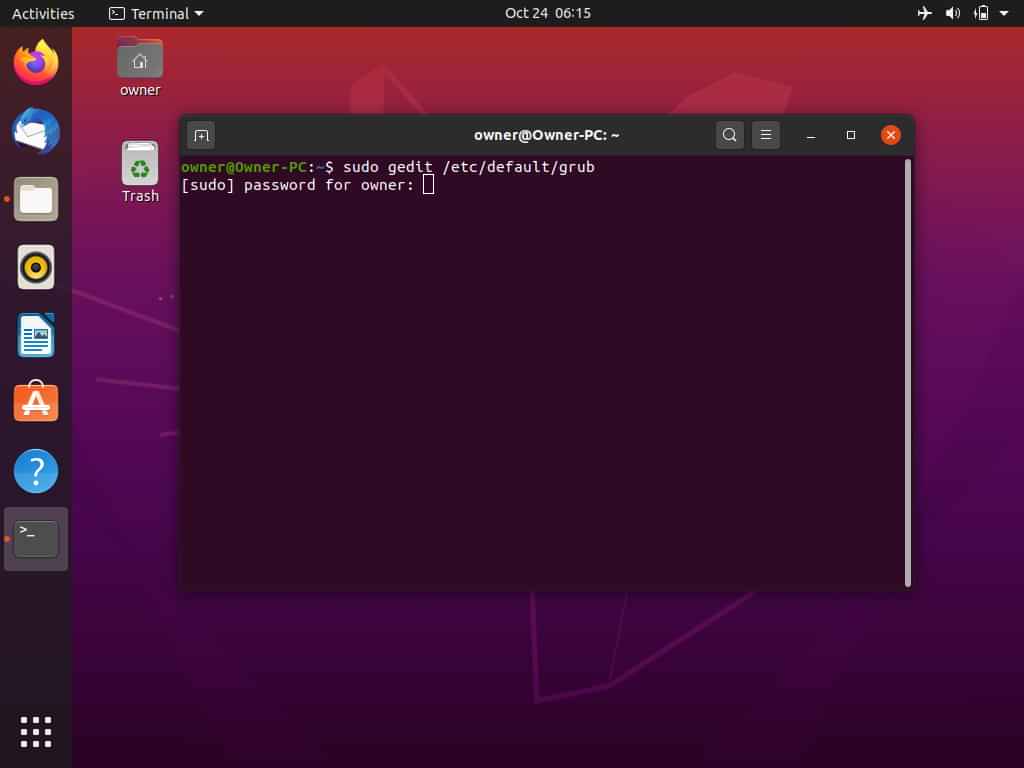
Enabling the mouse touchpad
We found this to only be an issue on the Toughbook CF-31 MK2. If your cursor moves when you use the touchpad, go ahead and skip this part. If you are having trouble with the mouse, follow these steps:
- Hit Ctrl+Alt+T to open the terminal.
- Type
sudo gedit /etc/default/grubthen hit Enter. - You will be prompted to type in your admin user password. Type your password and press Enter.
- A new window will pop up showing a text file. Find the part that says
GRUB_CMDLINE_LINUX_DEFAULT="quiet splash"and change it toGRUB_CMDLINE_LINUX_DEFAULT="quiet splash i8042.nomux i8024.noloop". - Press Ctrl+S to save.
- Press Alt+F4 to exit the text editor.
- Open the terminal again and type
sudo update-grubthen hit Enter. - Type
sudo shutdown nowand press Enter to shut down your computer (a normal reboot will not work for this). - After your computer shuts down, start it up again (your Ubuntu DVD from earlier should have been removed from the drive during the installation, but double check to make sure). You should now have a working mouse touchpad!
Fixing the sound
In our tests, every CF-31 except for the MK5 had audio problems. If your sound is working, you are one of the lucky few who can skip this part. For the rest, here’s how to fix it:
- Open the terminal (keyboard shortcut Ctrl+Alt+T).
- Copy/paste
sudo gedit /usr/share/pulseaudio/alsa-mixer/paths/analog-output-speaker.confand press Enter. - When prompted, type your password and press Enter.
- A text file called analog-output-speaker.conf will open up in a new window. In the text file, find this part:
[Element Headphone]
switch = off
volume = off
and change it to this:
[Element Headphone]
switch = off
volume = merge
override-map.1 = all
override-map.2 = all-left,all-right
- Next, in the same text file, find this part:
[Element Speaker]
required-any = any
switch = mute
volume = merge
override-map.1 = all
override-map.2 = all-left,all-right
and change it to this:
[Element Speaker]
required-any = any
switch = mute
volume = off
- Save your changes to analog-output-speaker.conf using either Ctrl+S or the save button at the top of the file editor.
- Go back to the terminal, type
sudo rebootand press Enter to reset your Toughbook. - Once your Toughbook boots back up, check the audio. It should be working now.
Calibrating the touch screen

If you try to use the touch screen after installing Ubuntu, you’ll find that it doesn’t register an input in the same place as you touch. The most reliable way to fix this is to create a small calibration utility that will run in the background every time you boot up your CF-31 (too many startup programs can slow your computer down, but don’t worry about this one; it works almost instantaneously, so you won’t even notice it’s there). Here’s how to set it up:
- Open Startup Applications Preferences from the Applications Menu.
- Click the Add button.
- In the Add Startup Program window, give your program a descriptive name, like “Touch Screen Calibration.”
- In the box labeled Command, copy and paste one of the following lines of text, depending on the generation of your Toughbook CF-31 (if you don’t know the generation, or MK, here’s a guide that will help you figure it out):
For the CF-31 MK1:xinput set-prop "Fujitsu Component USB Touch Panel Pen (0)" "Coordinate Transformation Matrix" 1.075, 0, -.03, 0, 1.1, -0.07, 0, 0, 1
For the CF-31 MK2 - 5:xinput set-prop "Fujitsu Component USB Touch Panel" "Coordinate Transformation Matrix" 1.075, 0, -.03, 0, 1.1, -0.07, 0, 0, 1 - Click Save and then close.
- Shut down your CF-31 and boot into the BIOS by hitting the F2 key as soon as the Panasonic logo pops up on screen.
- In the BIOS, make sure your Touchscreen mode is set to “Touchscreen Mode” and not “Auto” or “Tablet Mode.”
- Press F10 to exit the BIOS and save your changes if you made any.
Once your CF-31 boots up, the touch screen should be working properly. If it is, move on to the next section of this tutorial. If it isn’t,
- Open the terminal, type
xinputand hit Enter. A list of devices will appear. - Copy the name of the touch panel device listed under either "Virtual Core Pointer" or "Virtual Core Keyboard" (there will likely be a few items listed, but you should be able to tell from the name which one is the touch panel).
- Open Startup Applications Preferences, select the touch screen calibration utility we created earlier, and click the Edit button.
- In the Command box, find where it says
"Fujitsu Component USB Touch Panel"and replace it with the device name we copied from the terminal. - Click save, then reboot your computer.
Fixing the screen brightness keys
If you’ve tried to adjust the screen brightness using your keyboard, you may have noticed that the brightness bar will show up on the screen and move up and down, but the actual screen brightness doesn’t change. This is because of a miscommunication between the hardware and the software. Here’s how to fix it:
- Open the terminal (to do so, hold Ctrl+Alt+T).
- Type
sudo apt-get updateand hit Enter. - Enter your admin password when prompted.
- The terminal will spit out a bunch of text. Give it a minute or two to finish. It might pause and look like it’s done, but wait for the green text to show up.
- Type
sudo apt install inotify-toolsand hit Enter. - A prompt will appear, reading,
Do you want to continue? [Y/n]. Hit Y and then Enter. - Wait for it to completely finish, then type
sudo nano /usr/local/bin/redirect-brightness.shand hit Enter. This will create a new empty text file and open it in nano, a text editor that lives inside the terminal. - Copy all of this and paste it into the new empty text file we just created:
#!/bin/bash # NAME: redirect-brightness # PATH: /usr/local/bin # DESC: Redirect to correct driver when Ubuntu is adjusting the wrong # /sys/class/DRIVER_NAME/brightness WatchDriver="/sys/class/backlight/panasonic" PatchDriver="/sys/class/backlight/intel_backlight" # Must be running as sudo if [[ $(id -u) != 0 ]]; then echo >&2 "Root access required. Use: 'sudo redirect-brightness'" exit 1 fi # inotifywait required type inotifywait >/dev/null 2>&1 || \ { echo >&2 "'inotifywait' required but it's not installed. Aborting."; \ echo >&2 "Use 'sudo apt install inotify-tools' to install it.'"; \ exit 1; } # Was right watch driver directory name setup correctly? if [[ ! -d $WatchDriver ]]; then echo >&2 "Watch directory: '$WatchDriver'"; \ echo >&2 "does not exist. Did you spell it correctly? Aborting.'"; \ exit 1; fi # Was right patch driver directory name setup correctly? if [[ ! -d $PatchDriver ]]; then echo >&2 "Redirect to directory: '$PatchDriver'"; \ echo >&2 "does not exist. Did you spell it correctly? Aborting.'"; \ exit 1; fi # Get maximum brightness values WatchMax=$(cat $WatchDriver/max_brightness) PatchMax=$(cat $PatchDriver/max_brightness) # PARM: 1="-l" or "--log-file" then write each step to log file. fLogFile=false if [[ $1 == "-l" ]] || [[ $1 == "--log-file" ]]; then fLogFile=true LogFile=/tmp/redirect-brightness.log echo redirect-brightness LOG FILE > $LogFile echo WatchMax: $WatchMax PatchMax: $PatchMax >> $LogFile fi SetBrightness () { # Calculate watch current percentage WatchAct=$(cat $WatchDriver/actual_brightness) WatchPer=$(( WatchAct * 100 / WatchMax )) [[ $fLogFile == true ]] && echo WatchAct: $WatchAct WatchPer: $WatchPer >> $LogFile # Reverse engineer patch brightness to set PatchAct=$(( PatchMax * WatchPer / 100 )) echo $PatchAct | sudo tee $PatchDriver/brightness [[ $fLogFile == true ]] && echo PatchAct: $PatchAct >> $LogFile } # When machine boots, set brightness to last saved value SetBrightness # Wait forever for user to press Fn keys adjusting brightness up/down. while (true); do inotifywait --event modify $WatchDriver/actual_brightness [[ $fLogFile == true ]] && \ echo "Processing modify event in $WatchDriver/actual_brightness" >> $LogFile SetBrightness done - In the terminal, press Ctrl+O and then Enter to save your file.
- Press Ctrl+X to exit nano. (If you are running Ubuntu 22.04 skip steps 11 - 16 and begin the next set of steps.)
- In the terminal, type
sudo crontab -eand hit Enter. - Enter your admin password when prompted.
- Type 1 to select nano as your text file editor (you can choose a different editor if you want, but we think nano is the easiest).
- Using the arrow keys on your keyboard, bring the text cursor all the way to the bottom of the file where there is blank space and type
@reboot sudo redirect-brightness.sh -l - Just like in steps 8 and 9, press Ctrl+O and then Enter to save your file, then Ctrl+X to exit nano.
- In the terminal, type
sudo shutdown -r nowand hit Enter. Your computer will shut down. Once you start it back up, the screen brightness keys should function correctly.
***With the updated Ubuntu 22.04, some additional steps are required to get your screen brightness keys working. You can follow these steps to in this newer version after following steps 1 - 10 in the section above***
- Open the terminal.
- Type
sudo chmod a+x /usr/local/bin/redirect-brightness.shand hit Enter. - Exit the terminal.
- Open Startup Applications from the Show Applications menu on the desktop.
- Click the Add Button.
- Name the Startup Program something recognizable in the name field.
- In the Command field type
sudo redirect-brightness.sh -l. - Return to the section above and continue steps 11 - 16.
Fixes Submitted by Readers Like You
From time to time we receive messages from members of our community with their own versions of how to fix problematic issues in Ubuntu. Here are some of what some our talented community members have come up with!
Alternative Screen Brightness Fix
- Open the Ubuntu Terminal by pressing the keyboard combination Ctrl+Alt+T.
- Make sure that your graphics card is using some form of Intel HD Graphics by using following command:
lspci | grep VGAand pressing Enter - Change directories using:
cd /sys/class/backlightand hit Enter - List the files and folders in the directory that you changed to in the Terminal by typing:
lsand pressing Enter - Make sure the output of the last command is
intel_backlight - Change the grub file with
sudo gedit /etc/default/gruband press Enter(This command may feel familiar if you performed the Sound fix) - In the new window, look in the file for
GRUB_CMDLINE_LINUX_DEFAULT="quiet splash"or if you already performed the sound fix,GRUB_CMDLINE_LINUX_DEFAULT="quiet splash i8042.nomux i8024.noloop" - Change the line to
GRUB_CMDLINE_LINUX_DEFAULT="quiet splash acpi_backlight=video"orGRUB_CMDLINE_LINUX_DEFAULT="quiet splash i8042.nomux i8024.noloop acpi_backlight=video" - Type
sudo update-gruband follow up with the Enter key. - Now you'll need to restart the CF-31 by typing the command:
sudo shutdown nowand pressing Enter. - Once your CF-31 restarts and boots back into Ubuntu, open the Terminal back up with Ctrl+Alt+T.
- Navigate back to the same folder directory you were in before using
cd /sys/class/backlight - Use
lsone more time and make sure that the output readsapci_video0 - Finally, test out the brightness keys and see if they dim or brighten the LCD.
Starting a new journey
Now that you are up and running with Ubuntu on your Toughbook CF-31, it’s time to start your adventure with Linux! If you’re already familiar with the operating system, we hope this article helped you iron out a few wrinkles. If you are brand new, we hope you’ll enjoy this foray into the world of free and open source software. Now it’s time to explore. Leave a comment and let us know what you discover.