Mastering Ubuntu on the Panasonic Toughbook CF-19: Tips and Tricks.
30th May 2023
While small in stature and growing in age, the fully rugged Panasonic Toughbook CF-19 remains a top pick among the Toughbook community for its compact nature and unparalleled durability. However, once Microsoft drops support for Windows 10 in late October 2025, upgrading your CF-19 to Windows 11 may be more trouble than it is worth. However, never fear; you aren’t yet out of options for your operating system!
In the world of Linux, there are many distributions, or distros, as they are most commonly referred to. Every distro is tailor-made and packaged with a customized set of features that make no one distro like the next. The distro we’ll focus on in this article will be Ubuntu. It has a user-friendly interface but is still robust enough that Linux veterans should still be able to appreciate it. Ubuntu provides a lightweight and stable enough environment that is a perfect match for the CF-19.
Disclaimers!
Please note that we used Ubuntu 22.04.2 LTS (Jammy Jellyfish) when writing this article. Future versions of Ubuntu or any other flavors of the Ubuntu operating system, like Xubuntu and Lubuntu, are not guaranteed to work. Other Linux distributions, such as Manjaro and Linux Mint, may also not work. All commands and lines of code you see in this article are strictly for the Panasonic Toughbook CF-19 MK1 through MK8. While some of this guide may be transferrable to other computers, we will only answer questions geared toward the CF-19. We also have a guide on how to load Ubuntu on a Panasonic Toughbook CF-31!
Preparing the Installation Media
To cut this guide short, below are several links on creating a bootable device for Ubuntu provided by Ubuntu’s official website. Clicking on the links will open up a new tab. These instructions assume your CF-19 starts with Windows on it.
How to burn an installation DVD on Windows
How to create a bootable USB stick on Windows
How to burn an installation DVD on MacOS
How to create a bootable USB stick on MacOS
After you read one of these articles, you will need the Ubuntu .iso file to create a bootable media. As stated previously, we’re using Ubuntu 22.04.2 LTS, which you can find a link here. While these instructions say that we are using version 22.04.2, upgrading to the latest LTS may be advantageous if a new build releases since the fix for the tablet buttons may not work unless you have the latest build of Ubuntu. (If you plan to use a DVD, you will need an external USB DVD rewritable drive as the CF-19 does not have an optical drive.)
The Pre-Boot Environment
Now that you have a USB flash drive or DVD with the Ubuntu .iso installed, the next step involves instructing your Toughbook to boot from your created device. If you decide to use a DVD when making the bootable media, you will need to plug in the USB DVD rewritable drive that you used earlier again into one of your CF-19’s USB ports.
- Plug in your USB drive or your USB DVD rewriteable drive into one of the CF-19’s USB ports.
- Insert the Ubuntu DVD into the DVD rewriteable drive.
- Power on your CF-19 and wait for the Panasonic logo to appear on the screen. Once it appears, press F2 in order to enter your Toughbook’s BIOS.
- If you use Windows 10 or 11, and the F2 key does not bring you into the BIOS setup utility, allow your CF-19 to boot into Windows instead.
- Once inside your Windows 10 or 11 operating system, restart your computer. The Panasonic logo should reappear, allowing you to press F2 to get into the BIOS this time.
- Now that you are in the BIOS go to the Exit tab using your arrow keys.
- With the arrow keys, navigate to your Boot Override devices. Find the one that corresponds to your USB flash drive or USB DVD rewriteable drive, and press Enter to select it while hovering over the device name.
- If you use a DVD for the installation, you may be prompted on a black screen to press any key. Do so now to move on to the next set of steps.
Installing Ubuntu
The Ubuntu installation is pretty straightforward. Once you get into the Ubuntu menu, go through the prompts individually. Most of them are pretty obvious, but for the sake of following the guide, it is recommended to keep “Download updates while installing Ubuntu” checked. Once Ubuntu finishes downloading, it will instruct you to remove the installation media and press Enter. Congratulations! You have Ubuntu installed now, but that’s only half of the battle; we need to get the rest of the CF-19 functioning and compatible with Ubuntu.
Regaining Functionality
Unfortunately, Ubuntu’s OOBE (Out of Box Experience) and this compact, rugged tablet aren’t as polished as you’d hope. Here is a complete list of kinks we need to work out before your CF-19 is running how it should:
- Fixing the audio output
- Calibrating the touchscreen properly
- Enabling the front tablet buttons: On-screen keyboard and 90° screen rotation
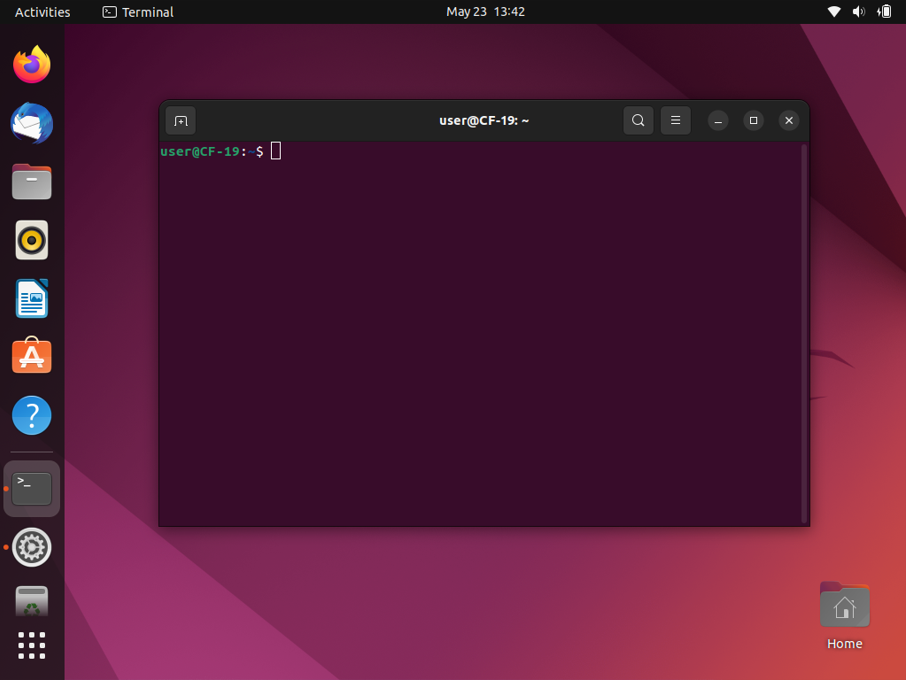
The Ubuntu terminal will be a crucial part of succeeding in following this guide. The terminal is a text-only interface that allows you to enter commands into your computer to complete various common administrative tasks. The terminal and its commands can be daunting, but step-by-step, we’ll assist you in achieving success. With a little copy and paste, you technically don’t even need to know what the commands mean!
Fixing the Audio
As you might notice, your CF-19 isn’t producing sound right now. If you are having this issue, here are the steps to fix it:
- Open the terminal using the keyboard shortcut Ctrl+Alt+T.
- Copy and Paste
sudo gedit /usr/share/pulseaudio/alsa-mixer/paths/analog-output-speaker.confand press Enter - The terminal will prompt you to type in your password. Do so and press Enter.
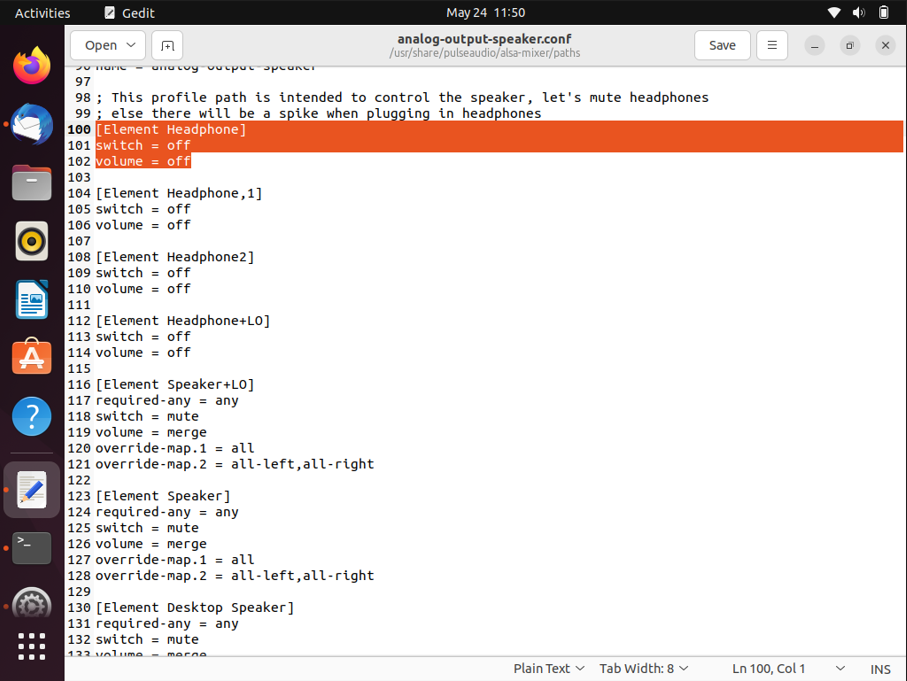
- A text file will pop up in a new window called analog-output-speaker.conf. In the text file, locate the following:
[Element Headphone]
switch = off
volume = off
and change it to this:
[Element Headphone]
switch = off
volume = merge
override-map.1 = all
override-map.2 = all-left,all-right
- Next, in the same text file, locate:
[Element Speaker]
required-any = any
switch = mute
volume = merge
override-map.1 = all
override-map.2 = all-left,all-right
and change it to this:
[Element Speaker]
required-any = any
switch = mute
volume = off
- Use the keyboard shortcut, Ctrl+S, to save your changes to analog-output-speaker.conf, or use the save button at the top of the text editor.
- Return to the terminal, type
sudo reboot, and press Enter to reset your Toughbook when complete. Do not reset your Toughbook using the reset button on the top right-hand corner of the screen, or it may not work. - Once your Toughbook reboots, check if your CF-19 has audio. It should be working now.
Calibrating the Touch Screen
If you try to drag your finger across the screen of your CF-19, you may notice the closer you get to the edge of the Toughbook, the less accurate the touchscreen’s calibration is. That needs fixing. Here’s how to set up the calibration:
- Open the terminal again with the Ctrl+Alt+T keyboard shortcut
- Copy and Paste
sudo gedit /etc/gdm3/custom.confand press Enter to open up custom.conf file. - If you’re prompted to enter your password, do so again and press Enter. Within the file, there should be a line that says the following:
#WaylandEnable=false
- Remove the "
#" symbol. - Type in the terminal
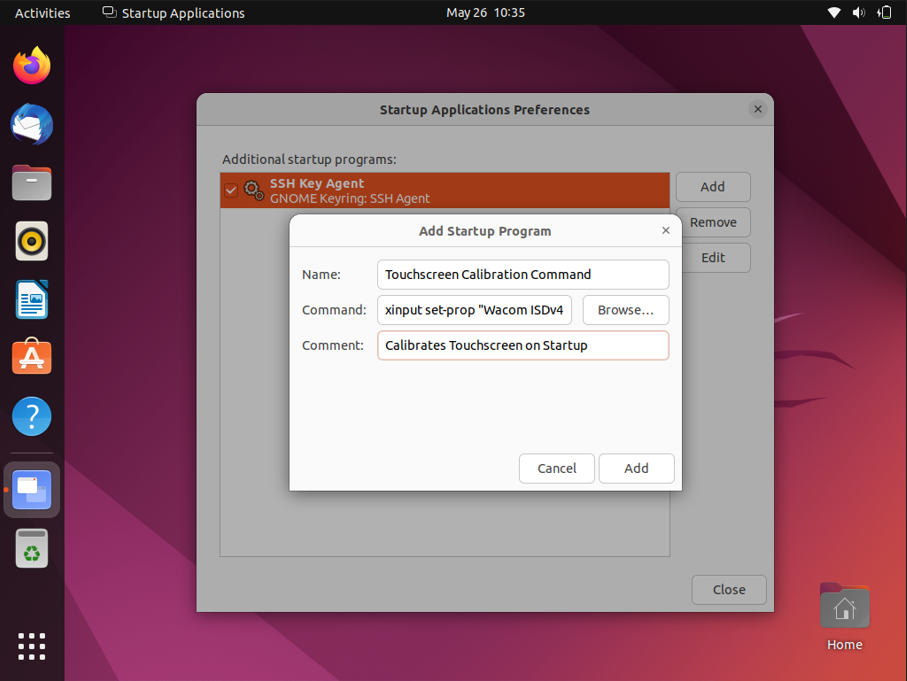
sudo rebootto restart the computer. - Open Startup Applications once the computer is in the operating system once again.
- Click the Add button.
- Name the command something recognizable, for example, “Touchscreen Calibration Command” in the Name blank.
- In the command box, copy and paste the following line of text:
xinput set-prop “Wacom ISDv4 93 Finger touch” “Coordinate Transformation Matrix” 1.075, 0, -.03, 0, 1.1, -0.07, 0, 0, 1Click Save and then close. - Reboot your CF-19.
- Test your touchscreen out; it should now be calibrated correctly.
Tablet Button Functionality
Now, the next portion of the guide will be the most difficult. Not only will the directions be lengthy, complicated, and to be followed precisely, but we even had issues getting the tablet buttons to work at first. Unfortunately, we were unable to get the tablet to rotate 180° from its original orientation; however, we were able to get the tablet to rotate at 0°, 90°, and 270°. If you can figure out how to get the tablet to rotate 180°, please post your fix in the comments, and we will update the blog.
- Connect to the internet using an Ethernet Cord or WiFi. You can connect to WiFi by clicking any of the icons in the top right corner of the screen. After that, then you’ll need to select in the drop-down
Select Networkand select your SSID. If your network is secured/encrypted, you must provide the password or encryption key in the text box. - Once connected to the internet, open the terminal using the shortcut Ctrl+Alt+T.
- Download updated package information using the following command:
sudo apt-get update, then press Enter. - Enter your password.
- Depending on whether you selected Minimal or Normal installation, it may prompt you to type Y or N in the terminal. Type Y and Press Enter
- Next, we have to install quite a few things, and we’re going to do it all at once using the following command:
sudo apt install git make build-essential dbus-x11 - Type Y into the terminal when prompted to continue to the install
- Once you have control of your terminal again, you’ll need to clone CyberpunkCoder’s Panasonic-hbtn repository by typing the command
git clonehttps://github.com/cyberpunkcoder/panasonic-hbtn - For this next part, we will want to be in the new directory we have recently cloned. Change it by typing
cd panasonic-hbtn(Assuming you are in the root directory). - Now we can run our make commands. Type
make cleanand press Enter.
- Then
make alland press Enter. - Then
make installand press Enter.
- Move back to the root directory by entering
cd /into the terminal and pressing Enter. - Change the directory you are located in by typing
cd /usr/local/bin/into the terminal. - Open up the script “rotate-screen.sh” by typing
sudo gedit rotate-screen.shinto the terminal and press Enter to edit it in a text file. - Go to Line 10 in the script and change
Fujitsu Component USB Touch PaneltoWacom ISDv4 93 Finger touch. - Save the script using the save button at the top of the window or the keyboard shortcut, Ctrl+S.
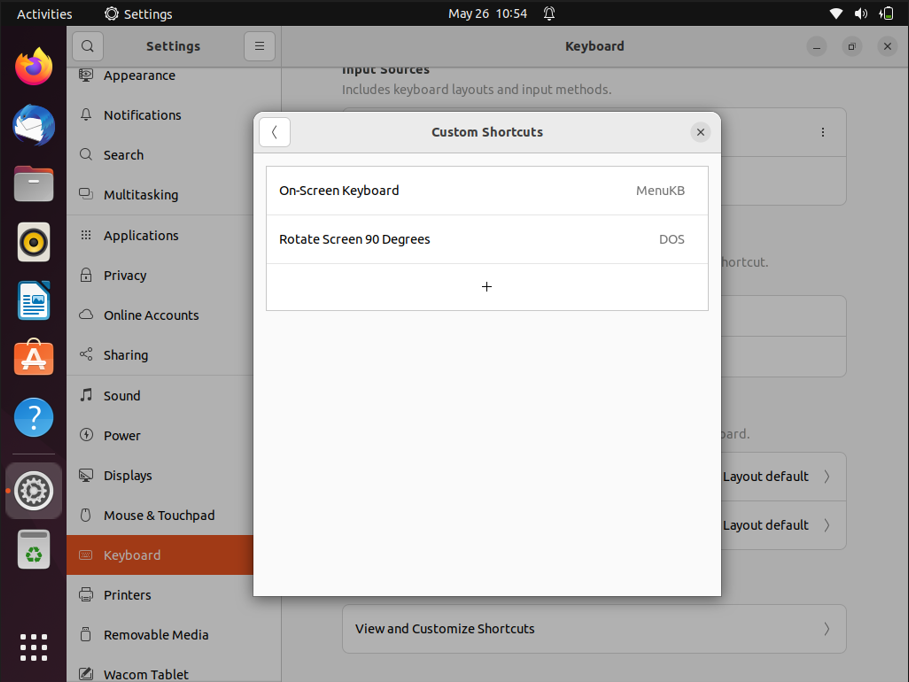
- Close out of the text editor and open up the Settings Menu in the top right-hand corner of the screen.
- Scroll down and select Keyboard on the panel on the left of the window.
- On the larger right-hand part of the window, under Keyboard Shortcuts, click the View and Customize Shortcuts button.
- Scroll down to the bottom and select Custom Shortcuts on the new window.
- Click the green Add Shortcut button.
- Name the shortcut something recognizable in the Name field.
- In the Command field, type
rotate-screen.sh - Select the Set Shortcut button and, on your Panasonic CF-19, press the screen rotation button on the front of your Toughbook.
- Click the X in the top right-hand corner of the window after you finish setting up your keyboard shortcut.
- Click the large + symbol below your first shortcut to add a second shortcut.
- Repeat steps 18 through 21, except in the Command field, you will be typing
toggle-screen-keyboard.shand setting the Shortcut Key to the On Screen Keyboard Key on the CF-19. - Test out your CF-19’s tablet buttons; the rotate screen button should now rotate the screen, and them on-screen keyboard button should bring up the on-screen keyboard. (The rest of the keys should have already been working). If you skipped the Touchscreen Calibration fix for the CF-19, in order to get the screen rotation feature to work, make sure you disable Wayland and restart your computer before rotating your screen.
If you’ve gotten this far, congratulations! It certainly wasn’t an easy task to get here. You now have a fully working Ubuntu operating system to begin your adventure. Whether you’re a Linux expert or just getting accustomed to them operating system, we hope this guide has helped you somehow. Let us know what you learned or discovered in the comments. We would love to hear your thoughts!